Master production guide • Version 2 | October 2026
For artists, customers, designers, and production staff. This is the comprehensive reference guide—not the Vinny Vinyl Bulletin article. Adapt every recommendation to the actual printer, substrate, finishing process, and viewing distance.
1 | The universal job brief
• Finished product and dimensions. State exact trim size, orientation, aspect ratio, material, and whether it will be a banner, decal, rigid sign, poster, or art reproduction.
• Viewing conditions. Specify typical viewing distance, indoor/outdoor use, lighting, and whether close inspection matters.
• Important content. Identify focal point, must-keep details, brand colors, logos, text, and a safe area for hems, grommets, pole pockets, or trimming.
• Image requirements. Ask for the highest native resolution available and a clean composition that can be enlarged. Do not assume an AI tool can guarantee a particular DPI or exact pixel dimensions.
• Delivery and approval. Request a clean master without mockup shadows, watermarks, or invented logos; confirm permission to use source/reference artwork and obtain customer proof approval.
NEW — Define the artistic intent. State the message or emotion, focal subject, hierarchy, background simplicity, negative space, and any approved reference image. For series, explicitly define what must remain consistent.
NEW — Decide the approval stages. First approve composition and content; then prepare the enlarged production file; finally approve a representative full-scale proof.
2 | Three production tracks
Track A | Illustrated, graphic, or cartoon AI artwork
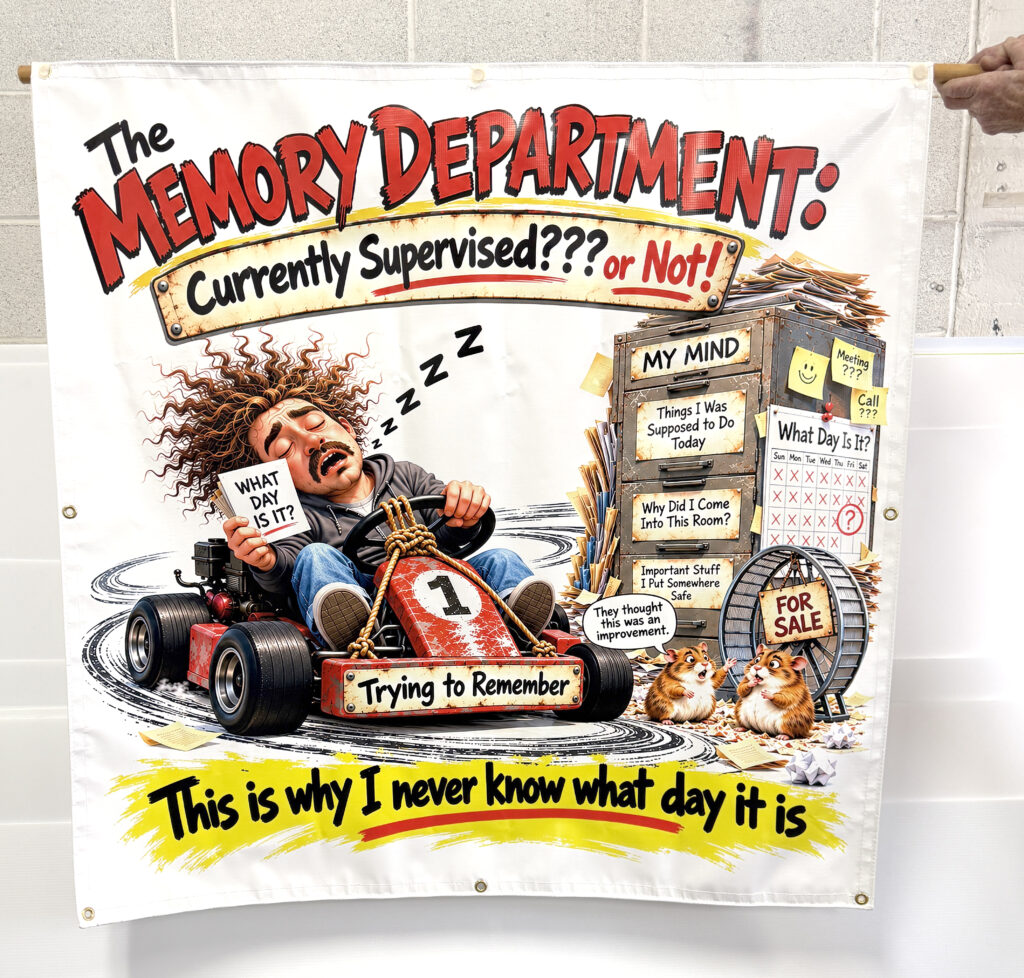
Best suited to: stylized characters, comic illustrations, bold-color graphics, playful posters, simplified backgrounds, and designs with strong silhouettes and edges. The Memory Department 4 × 4-foot banner is a successful production example.
1. Plan the composition. Specify final aspect ratio, subject, expression, camera framing, negative space, and simple visual hierarchy. Avoid putting essential objects against edges.
2. Request clean illustration. Ask for crisp boundaries, deliberate color blocks, controlled texture, legible silhouettes, and separation between subjects and background.
3. Keep lettering separate when possible. Generate artwork without critical small text; set exact wording in Photoshop, Illustrator, or another design application as editable type or vectors. AI image text can be unreliable.
4. Inspect the native output. Zoom to 100% and inspect fingers, faces, line work, gradients, repeating details, unintended artifacts, and odd lettering.
5. Resize deliberately. Work in Photoshop at final dimensions or a documented scale; use a suitable resampling method. Upscale only as much as needed, in a controlled sequence.
6. Sharpen gently at output size. A restrained Unsharp Mask or Smart Sharpen may help illustrated edges. Watch for white/dark halos, jagged lines, crunchy textures, and amplified noise.
7. Proof before production. Print a representative crop at 100% of final physical size. Review at arm’s length and the expected display distance.
8. Export and archive. Keep layered working file and approved master; export in a format supported by the shop’s RIP with fonts/text handled correctly and embedded color profile where appropriate.
Copy-ready AI request: illustrated artwork
Create an original [cartoon / graphic illustration] for a printed at [width × height, units], [portrait/landscape], aspect ratio [ratio]. Main subject: [description]. Use strong, clean silhouettes, well-defined edges, deliberate color areas, and readable separation between foreground and background. Place the key subject inside a generous safe area; leave [location] open for wording that will be added later. Avoid tiny details, AI-generated lettering, logos, borders, watermarks, and important elements near finishing areas. Output at the highest native resolution supported. Do not claim the image is print-ready; I will inspect and prepare it in Photoshop.
Track B | Photorealistic, cinematic, or detailed 3D AI artwork
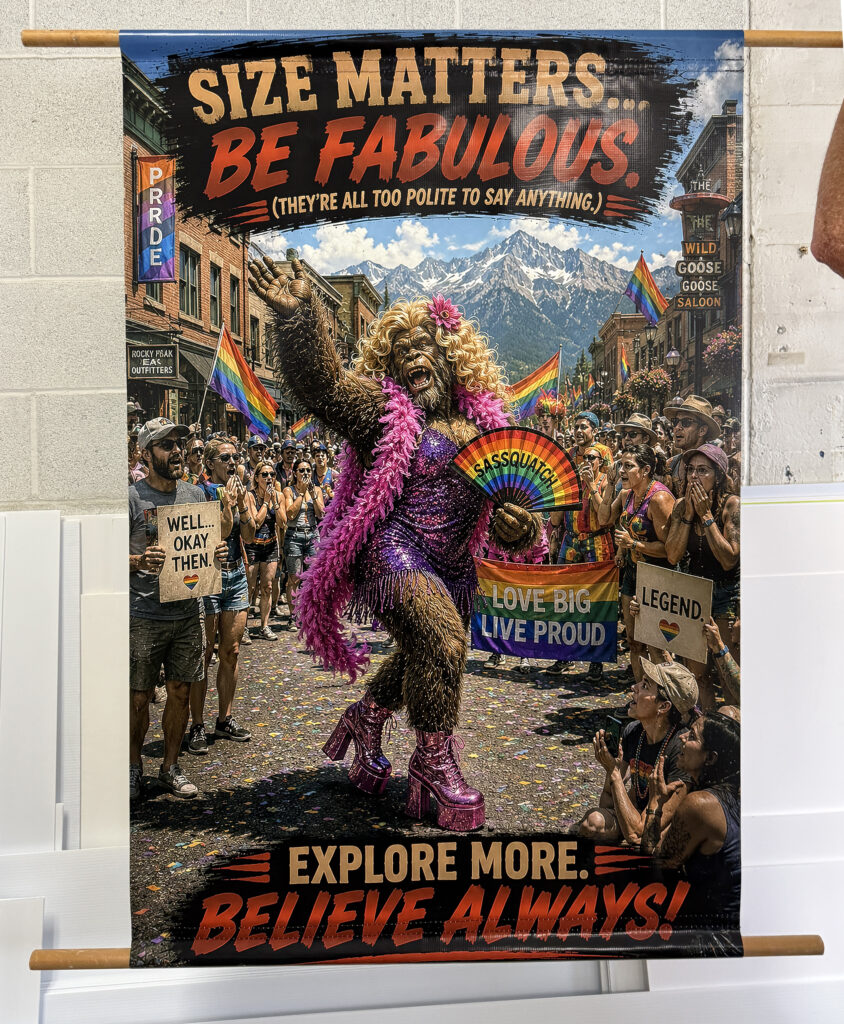
Best suited to: realistic characters, Bigfoot-style imagery, detailed fur, water, natural lighting, skin, fine textures, dimensional environments, and photographic exhibition banners. The 36 × 72-inch Pride Bigfoot banner was visually successful but showed some fine-detail loss at large size.
1. Design for physical size. State final aspect ratio, expected viewing distance, focal area, and finishing clearances before generation. Prioritize believable large forms and clear subject separation.
2. Request coherent natural detail. Ask for consistent fur strands, anatomically plausible features, physically believable reflections and lighting, and natural transitions rather than indiscriminate “ultra-sharp” texture.
3. Inspect for AI artifacts. Check eyes, teeth, hands, anatomy, hair/fur, reflections, background repetitions, inconsistent shadows, and texture that looks painted or melted.
4. Upscale before final sharpening. Try Photoshop Camera Raw Enhance/Super Resolution when compatible with the source and workflow, or a trusted image upscaler. Compare outputs; invented detail can look convincing but inaccurate.
5. Retouch selectively. Use masks to improve important focal details while avoiding aggressive sharpening on fur, foliage, bokeh, smoke, water, and softly lit backgrounds.
6. Check tonal transitions. Watch for banding in gradients, noise, blocked shadows, blown highlights, edge halos, oversaturated colors, and plastic-looking skin or fur.
7. Print a 100%-size crop. Choose a crop with face/eyes/fur and another with a smooth gradient if needed. Assess from realistic viewing distance, not only at 100% monitor zoom.
8. Approve the real print. Compare a proof to intended use. A slight loss of close-up microdetail may be acceptable on a six-foot banner but not on a close-view fine-art reproduction.
Copy-ready AI request: photorealistic artwork
Create an original photorealistic [scene/character] for a large-format
at [width × height, units], aspect ratio [ratio], normally viewed from [distance]. Show [main subject and action] with coherent anatomy, natural lighting, realistic depth, believable materials, and carefully rendered facial/foreground detail. Keep the composition clean and the subject distinct from the background. Preserve extra space for [pole pockets / hems / grommets / trimming] and leave [area] free for separately typeset wording. Avoid artificial over-sharpening, repeated textures, unnatural fur, invented logos, watermarks, and tiny essential details. Provide the highest native resolution supported; do not invent claims about DPI or print readiness.
Track C | Fine-art, conservation, and reference-led series
Best suited to: gallery reproductions, educational collections, botanical or wildlife portraits, museum-style posters, and consistent multi-image series. Based on the approved When the Last One Is Gone / Sudan reference workflow.
1. State the artistic purpose. Define what the image communicates. For the conservation collection, a dignified living subject represents the species and white negative space represents its absence.
2. Fix composition before generating. Use a horizontal 4:3 canvas, place the subject left or right, and reserve approximately two-thirds of the canvas as uninterrupted pure-white negative space. Keep the subject anatomically complete and visually strong.
3. Control habitat and light. Keep environmental elements minimal, gently fading into white. Avoid heavy scenery, strong background shadows, frames, and decorative clutter.
4. Use an approved visual anchor. The Sudan northern white rhinoceros poster (2018) is the collection’s reference for relative subject scale, detail, lighting, whitespace, and text hierarchy. Supply the reference where the AI platform supports it.
5. Treat species information as research. Verify scientific name, physical appearance, last confirmed year, and ecological role from reliable references. Distinguish extinction from extinction in the wild and avoid unsupported ecological claims.
6. Keep typography restrained. Position the common name, italic scientific name, final confirmed year, and one ecological-role sentence beneath the subject—centered within the subject’s area, not the entire canvas. For reliable production, typeset final text separately.
7. Review before enlarging. Approve anatomy, subject scale, white-space balance, typography placement, and historical/scientific details before print preparation.
8. Prepare and proof the file. For the collection, the target is 48 × 36 inches (4:3), 14,400 × 10,800 pixels at 300 PPI, PNG, RGB working file, white background. These are target output specifications, not guaranteed native AI generation capabilities. Verify actual pixels, resampling, color profile, and a full-size proof.
Copy-ready AI request: fine-art series
Create an original, dignified, scientifically grounded portrait of [species] for a horizontal 48 × 36-inch fine-art print (4:3). Position the living subject on the [left/right], preserving approximately two-thirds of the canvas as pure white negative space. Render the subject with accurate anatomy, natural illumination, crisp but believable detail, and only minimal habitat fading softly into white. Do not crop important features or add borders. Follow the supplied approved Sudan artwork for relative scale, hierarchy, and restrained mood, if reference images are supported. Reserve space directly beneath the subject for separately typeset common name, scientific name, final confirmed year, and one verified ecological-role sentence. Generate the highest native resolution available. Present artwork for approval first; do not claim that requesting 14,400 × 10,800 pixels or 300 PPI guarantees those properties in the generated file.
3 | Working with ChatGPT, Gemini, Claude, Firefly, Copilot and other AI
The production-brief method is broadly transferable. Actual image generation, reference-image handling, editing, export dimensions, and commercial-use terms vary by tool, model, plan, and version. Verify capabilities and license terms before use.
Platform / category
-Best use of this guide
-Important qualification
ChatGPT image tools
-Draft and revise images with detailed briefs and references
Reference/edit capabilities depend on model/interface
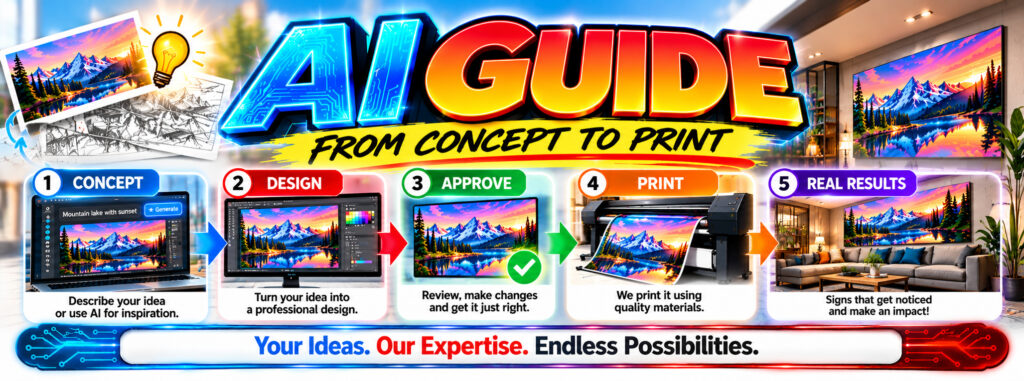
Cross-platform method: (1) write the complete brief, (2) provide approved references when supported, (3) generate and inspect, (4) request one targeted change at a time, (5) export and verify pixels, (6) prepare separately in design software, (7) print a full-scale proof.
4 | Resolution and print-size planning
Pixel dimensions = finished inches × target PPI. Effective PPI = actual pixels ÷ printed inches. A 300 DPI/PPI metadata tag alone does not add image information. Large signs often need less effective PPI than close-view artwork; use proofing and viewing distance to decide.
Finished size
-Aspect ratio-
Pixels at 300 PPI (reference only)
8 × 10 in 4:5 2,400 × 3,000
18 × 24 in 3:4 5,400 × 7,200
24 × 36 in 2:3 7,200 × 10,800
36 × 48 in 3:4 10,800 × 14,400
48 × 36 in (horizontal) 4:3 14,400 × 10,800
48 × 96 in 1:2 14,400 × 28,800
Example: a 4,096-pixel-wide image at 48 inches wide provides approximately 85 effective PPI before resampling. This may be appropriate for some distance-viewed banners but may fall short for a close-view fine-art print.
5 | Production workflow and quality control
How to ask ChatGPT or another AI for better results
Give the whole brief, not just the subject. “Bigfoot with a flag” is a concept; a production brief also specifies 36 × 72 inches, portrait orientation, where pockets go, safe area, viewing distance, realism, and where text will be placed.
Use reference images carefully. Supply approved character or brand references when the tool supports them; explain what must remain consistent. Verify usage rights and do not expect exact likeness or perfect text reproduction.
Ask for one change at a time. If an image is close, request specific edits such as “more negative space above the head” rather than a vague complete redesign. Save approved versions.
Ask for a preflight review. Prompt: “Review this image for enlargement risks: fine detail, edges, gradients, anatomy, typography, cropping, and finishing clearance. Tell me what to fix before print.”
Do not confuse pixel count and DPI. Pixel dimensions describe the data available; PPI is pixels divided by physical print inches. A file tag of 300 DPI does not create additional detail.
Production math and quality checks
Effective PPI = image pixel dimension ÷ final print dimension in inches. Example: a 4096-pixel-wide file printed 48 inches wide gives about 85 PPI before resampling. That may work at distance on some banners, but it is not a universal pass/fail standard. A close-view art reproduction generally needs more real image detail than a banner seen across a room.
Final dimensions and bleed. Set actual trim size, appropriate bleed, and separate finishing-safe zones. Pole-pocket allowance depends on pocket construction and shop finishing method; confirm it rather than assuming a fixed number.
Color and output. Keep source profiles organized, soft-proof when practical, use calibrated displays when available, and let the RIP/printer/material ICC workflow determine final color conversion. RGB versus CMYK requirements depend on the specific workflow.
File preparation. Keep an editable master; inspect at actual print size; verify fonts, transparencies, image links, and raster effects; follow the RIP’s accepted file format settings.
Large-format proof. Print one or two critical sections at final scale; include the face/fur, text/edges, and gradients where relevant. Judge at intended viewing distance and under appropriate light.
Record the job. Save original pixel dimensions, target size, effective PPI, upscaling tool/settings, sharpening settings, material, printer/RIP settings, viewing distance, and proof observations. These records turn experiments into a repeatable standard.
Red flags: stop and revise before printing
Text that is misspelled or baked into the image; faces or hands with AI distortions; a subject cropped by pockets or grommets; jagged illustrated edges; sharpening halos; unnatural photorealistic fur; muddy shadow detail; obvious gradient banding; an image that looks fine on screen but fails a 100%-scale crop; or customer-critical colors that have not been proofed.
Two real-world lessons from ISF
THE MEMORY DEPARTMENT — A 4 × 4-foot illustrated banner made from the approved artwork printed with excellent results. Defined graphic shapes and careful Photoshop sharpening helped preserve the intended look.
PRIDE BIGFOOT — A 36 × 72-inch photorealistic-style banner with pole pockets looked good in production, although some fine detail softened. This suggests that realistic texture needs a more cautious upscale-and-proof workflow than bold illustration.
The goal is not to promise perfection from every AI file. It is to build a dependable process for deciding which artwork is ready, what needs correction, and what quality is appropriate for the finished product.
6 | Final preflight checklist
☐ Job size, orientation, aspect ratio and intended viewing distance confirmed
☐ Composition, reference consistency, important details and safe areas approved
☐ Customer-supplied reference rights and final text/logo accuracy confirmed
☐ Actual pixel dimensions and effective PPI calculated (not inferred from metadata)
☐ Artifacts, anatomy, sharpness, halos, banding and gradients inspected
☐ Color profile, substrate, RIP settings and finishing allowances verified
☐ Full-size representative print crop reviewed and customer proof approved
☐ Original, edited master, output file and settings archived
7 | Universal copy-and-paste starting prompt
Create original [illustrated / photorealistic / fine-art] artwork for with final dimensions [width × height], [orientation], aspect ratio [ratio], and expected viewing distance [distance]. Main subject and message: [description]. Artistic style and lighting: [description]. Place the focal subject [location] and reserve [amount/location] of clean negative space for [text / absence / layout]. Keep essential content away from [trim / grommets / hems / pockets]. Use supplied approved references for [specific consistent elements], if supported. Avoid watermarks, invented logos, incorrect lettering, and distracting artifacts. Generate at the highest native resolution available. Show the artwork for approval first. Do not assume the exported file is print-ready; report actual pixel dimensions when available, and leave final text, resizing, color conversion, and proofing to the production workflow.
Production principle: the AI prompt improves creative direction; verified pixels, retouching, typography, color management, and physical proofing determine print readiness.
YOUR IMAGINATION IS JUST THE BEGINNING!
Dream big. Create boldly. And don’t be afraid to experiment!
AI is opening doors to creative possibilities we could only imagine a few years ago. Whether you’re bringing Bigfoot to life, designing a breathtaking landscape, promoting your business, or creating something the world has never seen, every great idea starts with a little imagination and a willingness to try.
Remember, AI doesn’t replace your creativity—it gives your imagination another tool to play with! Experiment, make mistakes, laugh at the unexpected results, and keep refining until your vision comes to life.
And when you’re ready to take that masterpiece from your screen into the real world, Instant Sign Factory is here to help turn those pixels into something spectacular!